How I turned a chest freezer into my personal ice bath sanctuary
After sharing my experience with breathwork and cold exposure in my previous post, I kept experimenting. Cold showers were my gateway, but eventually I wanted more intensity and consistency.
Why switch from cold showers to an ice bath?
Two main reasons:
Greater impact: Ice baths deliver a much deeper mental reset. I find myself sharper, calmer, and more energized for the day. The mood boost is noticeable.
Seasonal shift: As summer approaches in Italy, even the coldest tap water isn’t cold enough to activate the physical and mental benefits of cold exposure (e.g., reduced inflammation, boosted immune system, improved stress resilience).
Right after experiencing my first ice bath during the Wim Hof winter expedition, still buzzing from the feeling, I started looking into plug-and-play setups for doing it at home. But I was shocked to see the prices: starting from 6.500,00€ and going up to 12.000,00€. I'm sure they're excellent products, but for me, it didn’t make sense to spend that kind of money on what is, in the end, just a freezer. I live in a regular home: what would I do with a luxury wellness device in a non-luxury setting?
I quickly ruled that out. Then I looked into DIY solutions and found two main paths:
Chiller setup: A professional water chiller + a barrel or tub. It's what I dream of building one day (more specifically, by using a vintage wine barrel 😊), but still a 1.800,00€–2.000,00€ project. Too much for my entry-level "quick and dirty" needs.
Chest freezer conversion: Affordable, practical, and widely used by the cold exposure community.
I chose the second option, and in this article, I’ll walk you through exactly how I built it.
Step 1: Sourcing the chest freezer
The first thing you need is obvious: a chest freezer. I chose to buy a used one because I would have felt guilty about 'ruining' a brand new appliance. If you’re lucky, you might find one for €100, though €150–€250 is more common.

I recommend choosing a 400–500 liter model. A 300L unit might be a bit tight, and anything too big becomes less efficient to cool. The downside of buying used? Individual sellers rarely ship such a large item, so you’ll probably need to pick it up yourself from a local seller.
Step 2: Sealing and lining it
To waterproof it, I applied neutral sealant to every joint. Let it sit and cure for a day.

After that, I lined the entire inside with PVC pool liner. It wasn’t easy to avoid creases, but honestly, I didn’t mind. With a bit more patience, you could probably get a cleaner finish.
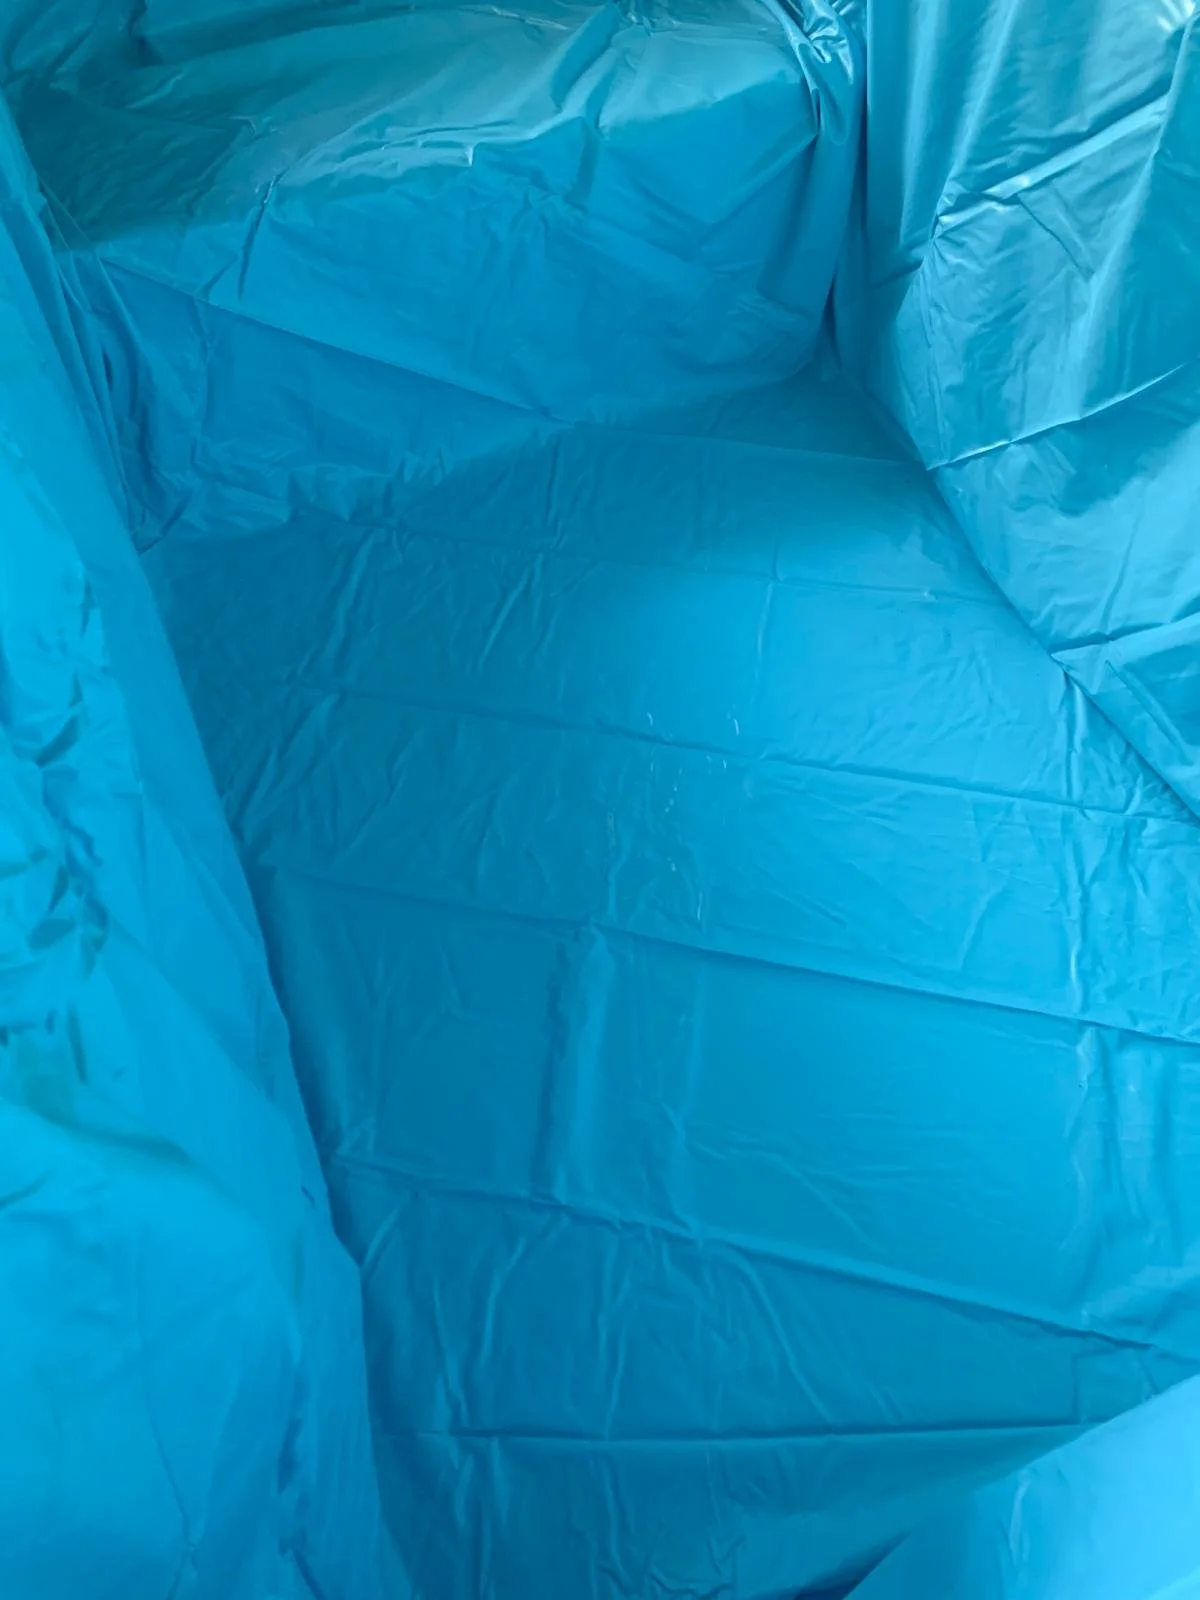

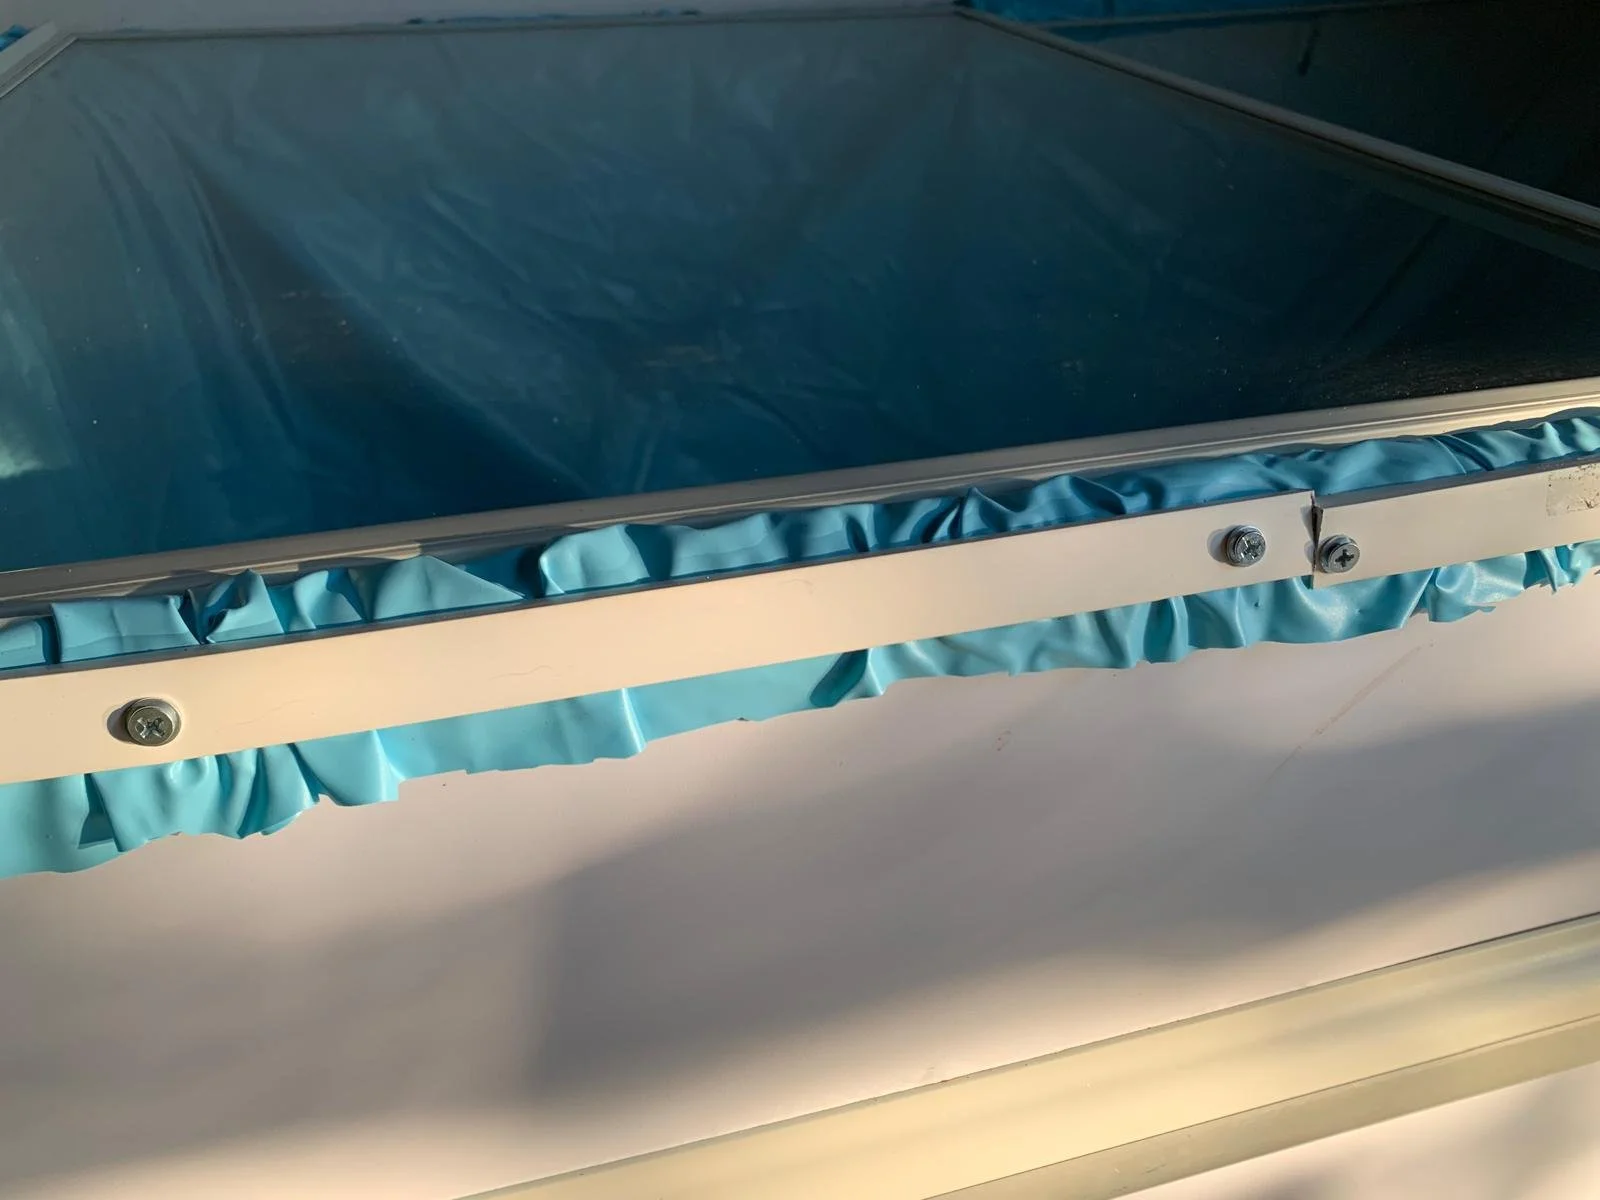
To keep the liner in place, I used PVC strips and secured them along the top edge of the freezer with self-tapping screws.
Step 3: Water, temperature, and thermostat
Once the liner was in, I filled the bath with enough water to comfortably sit and submerge up to my shoulders.
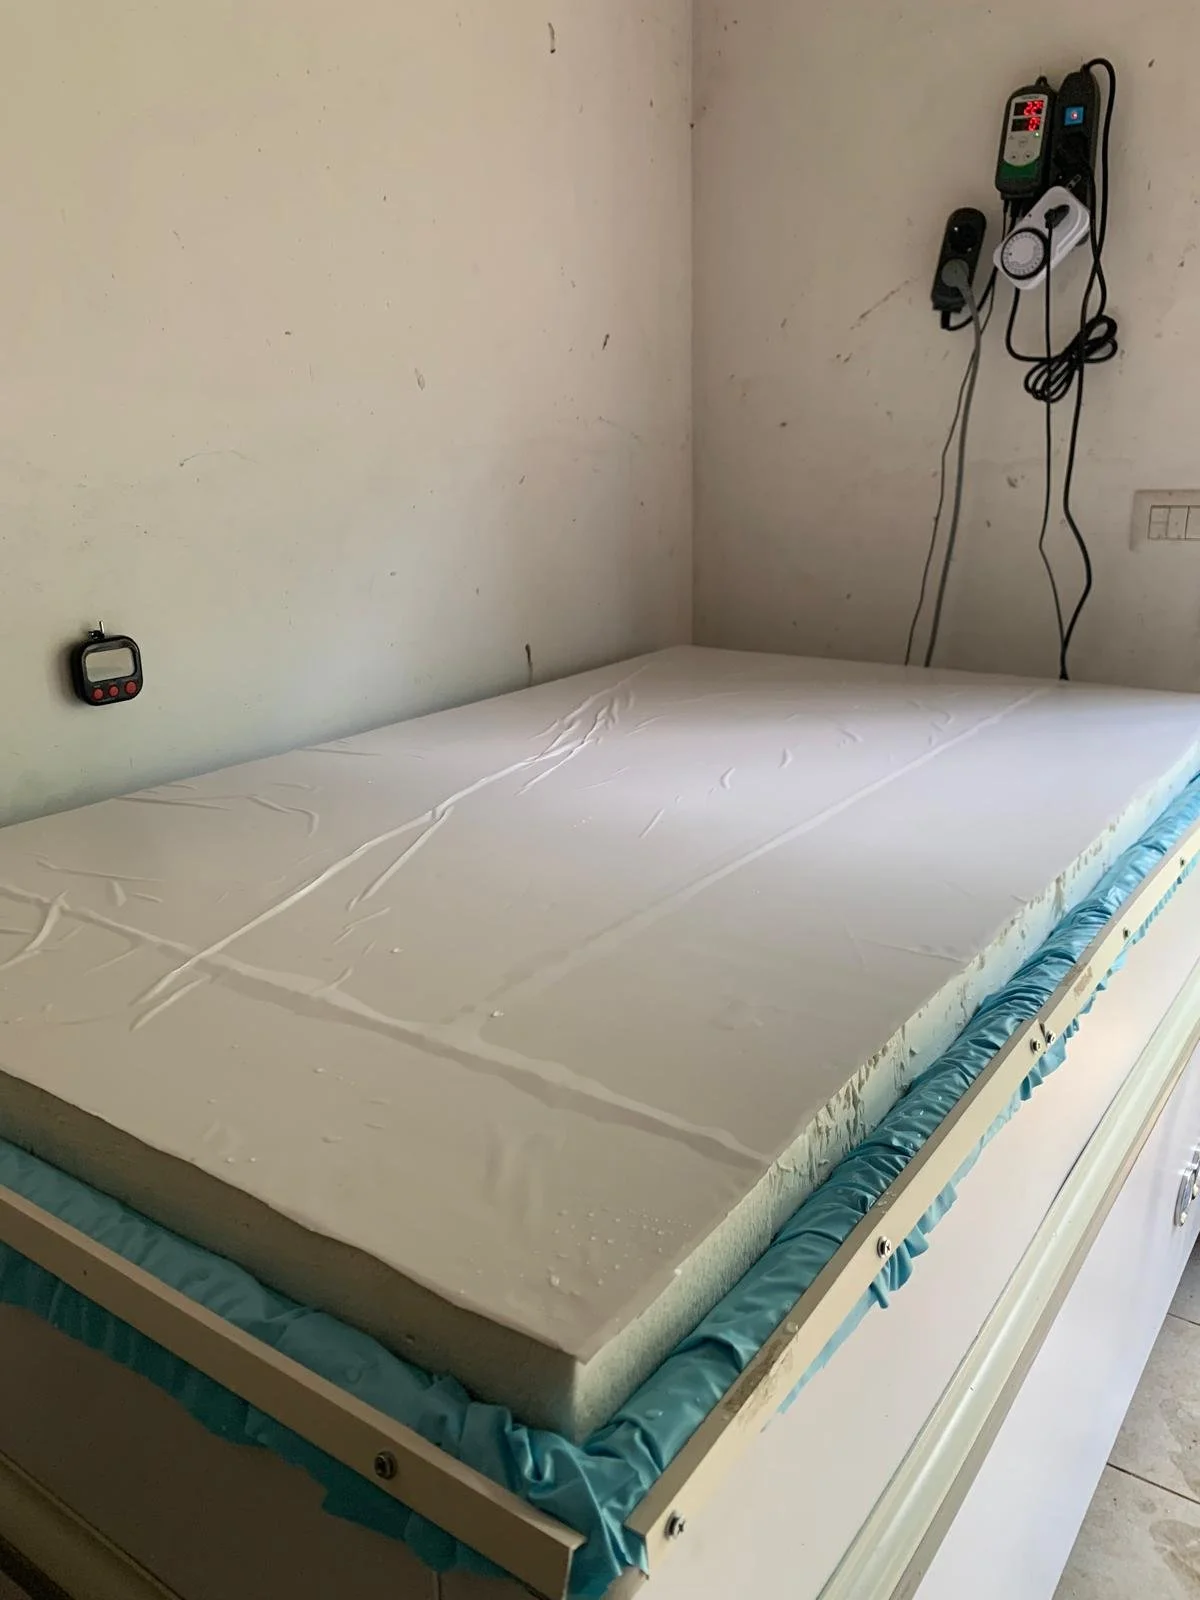
To control the temperature, I used an Inkbird ITC-308 digital thermostat. I placed the temperature sensor in the center of the bath and plugged the freezer into the thermostat instead of directly into the wall. This way, the Inkbird shuts off the freezer when it hits the target temperature.

Step 4: Keeping the water clean
I didn’t want to use chlorine or other chemicals, so I installed a UV lamp with a built-in pump, specifically the SunSun CUP 809, to keep the water clean. I also disabled the venturi tube by bending it, so it wouldn’t draw in air. Since oxygenation isn’t necessary in this setup, it was better to keep things as simple as possible.

Initially, I left the pump running all day, but I noticed something: no ice. The constant circulation prevented it from forming, not ideal for an ice bath. So I added a simple analog timer to run the UV pump just 3–4 hours per day.

I also noticed something interesting: when the water stays still, the temperature measured by the sensor tends to be higher than the actual temperature of the bath. As soon as the pump kicks in, the reading suddenly drops. This likely happens because stagnant water forms slightly warmer layers near the sensor, which can trick the thermostat into thinking the bath is warmer than it really is, causing the freezer to run longer than necessary.
To solve this, I set the pump to run in intervals throughout the day (one hour at a time, with a few hours in between). This not only helps maintain cleaner water but also ensures the thermostat gets a more accurate reading, avoiding unnecessary cooling cycles.
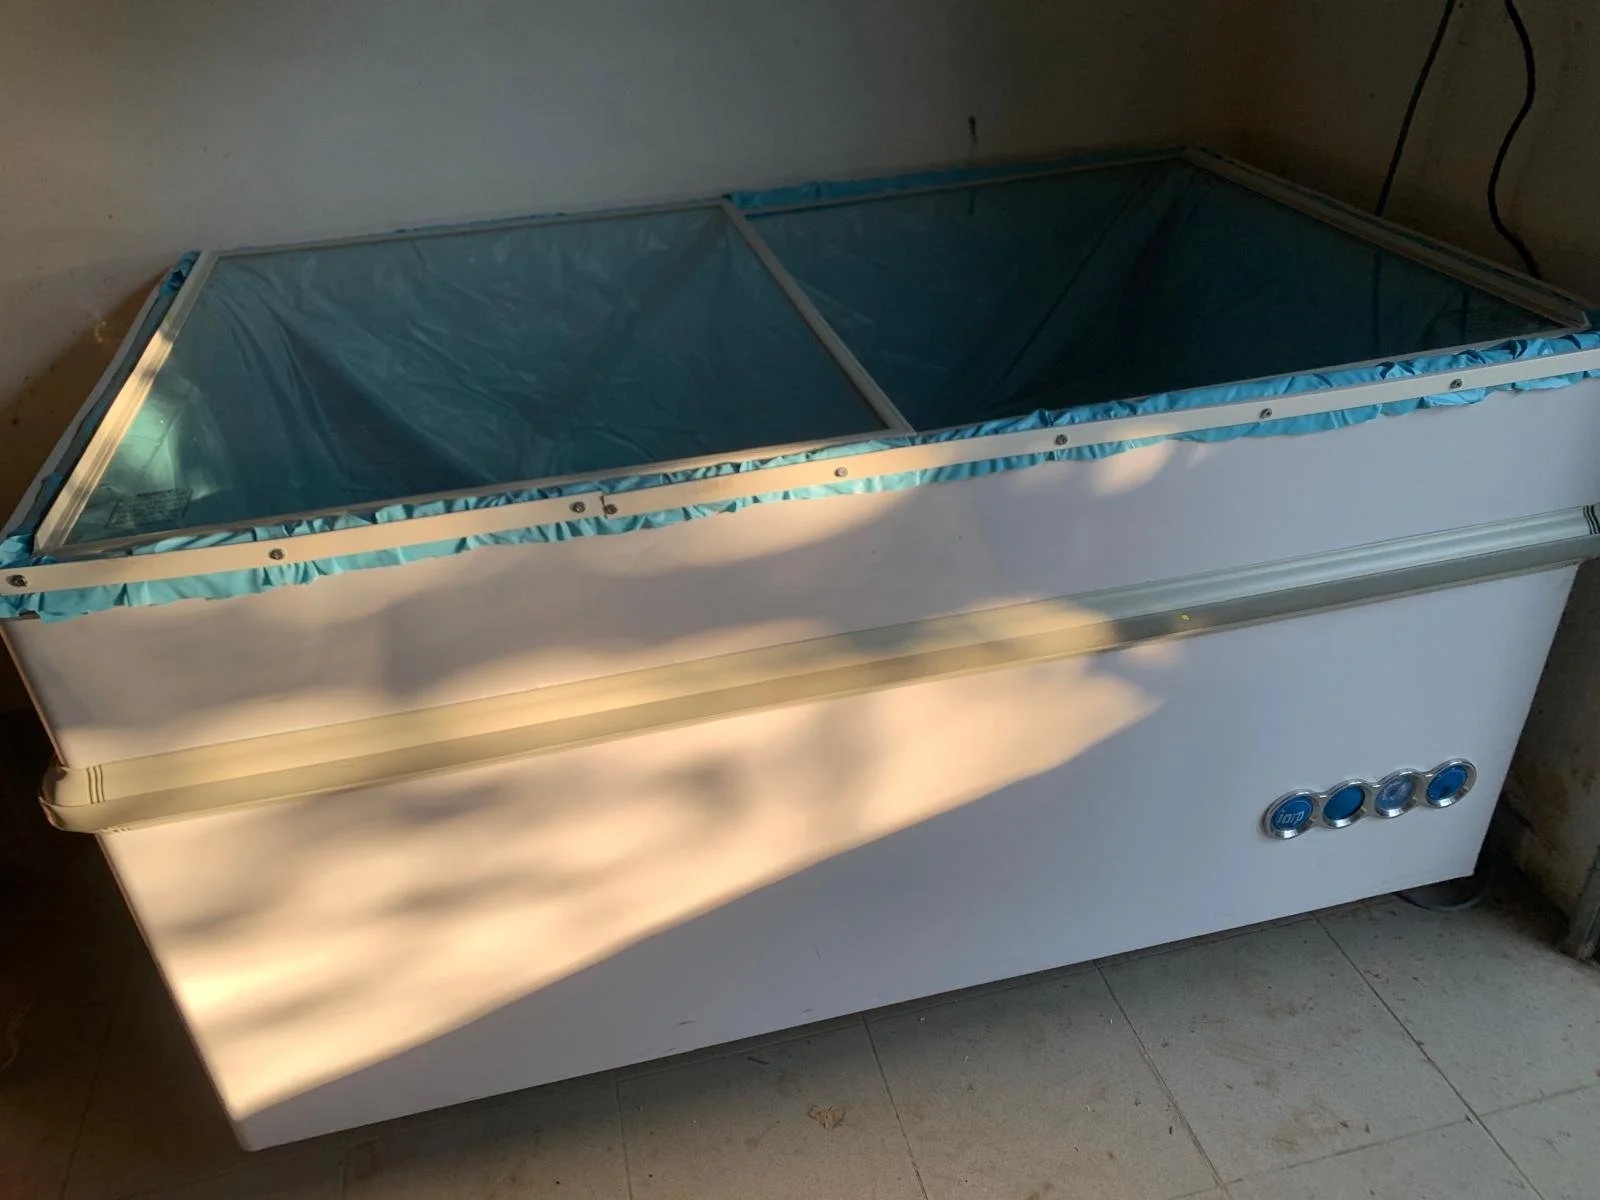
Step 5: Insulating the lid
If you find a typical chest freezer, that’s great. However, mine came from a local ice cream shop and had a glass lid, which is not ideal for insulation. To fix this, I replaced the lid with extruded polystyrene (XPS) panels, carefully cut to fit the opening. I sealed the panels together using the same waterproof neutral sealant I had previously used on the freezer joints.
Step 6: Tuning and testing
After setting everything up, stay flexible and open to experimentation. I had to adjust several things:
The thermostat’s target temperature
The position of the temperature sensor
The total pump hours
The number and timing of pump intervals
In time, I discovered the ideal balance to have cold water around 1.5°C, a good amount of ice, and a system that runs efficiently without overworking the freezer. You will need to conduct your own experiments to find the best setup for your situation.
Safety first
Even though this setup is generally safe, there’s one golden rule:
⚠️ Always unplug the freezer before you enter the bath. ⚠️
Tape a reminder on the lid if you have to. Safety before everything.
Final recommendations
You can also add a timer to your setup. I use a simple one to track how long I stay in the bath, since focusing on my breath means I tend to lose track of time. After the session, I spend a few minutes in horse stance to rewarm. It’s a posture combined with controlled breathing and muscle engagement, as taught in the Wim Hof Method, and it helps prevent afterdrop.

Last but not least, give your ice bath a name! Every ritual deserves its own temple, and I named mine FREEZEDOM. For me, cold exposure has become one of the most powerful and original ways to feel truly free. Not just free in the physical sense, but free from myself: from mental loops, self-doubt, the urge to fix every problem, or to slip into victimhood. The cold shuts off the noise. It clears my head and brings me fully into the present. It’s no longer just a practice, it’s a space where I reconnect with my body, test my limits, and remind myself that I'm not my thoughts. The cold is the door. The breath is the key. And FREEZEDOM is where I step through.
If you're curious or planning to build your own, feel free to ask or share your version. I'd love to hear it.